Fusion Cash Management (FCM) enables you to customize a filter to reduce the time and effort to select a set of filters every time you log in to FCM and search for certain information.
1. Navigate to Receivables.
2. Click Receivables Centre.
3. Click More Filters under the Filter section on the summary page.
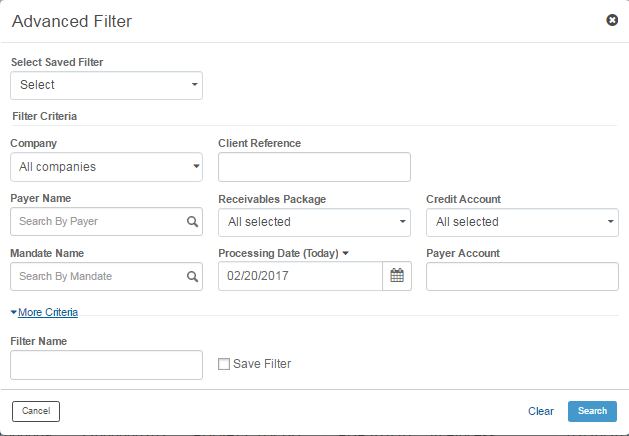
4. Specify the Filter Criteria:
• Company: Select the Company for which the filter is to be created.
• Client Reference: Specify the relevant client reference.
• Payer Name: Search and select the Payer name.
• Receivables Package: Select the required receivable package.
• Credit Account: Select the account in which you want to credit the amount.
• Mandate Name: Search and select the applicable mandate from dropdown list.
• Processing Date: Select the Processing date.
• Payer Account: Specify the payer account.
• Entry User: Search and select the entry user.
• Status: Select the required status. The available status are Pending Approval, Approved, and Rejected.
• File Name: Specify the File Name.
• Operator and Batch Amount: You can select the following operators and specify the amount:
– Equal To
– Less Than
– Greater Than
– Between
• Instrument Amount: Specify the transaction amount.
• You can specify the required Sorting Order using the ascending or descending links.
5. Specify the Filter Name to uniquely identify this filter.
6. Select the Save Filter check box to save the filter for future use or click Search to search using this filter. The saved filters are listed in the Select Saved Filter dropdown.
| © 2017-19 Finastra International
Limited, or a member of the Finastra group of companies (“Finastra”).
All Rights Reserved.
Cat ID: FCM4.6-00-U02-1.5.3-201903 |