You can add multiple instruments to a batch payment using one of the following methods:
For ease of use, Fusion Cash Management enables you to filter the listed payments to narrow down your search. The available filter options are:
• Product
• Receiver A/C
• Receiver Name
• Operator
• Amount
• Status
• Credit
• Debit
You can add multiple instruments to a batch.
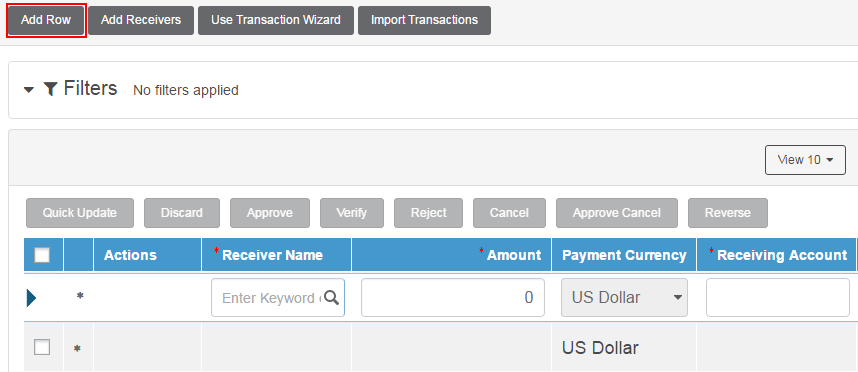
1. Specify the following details:
• Receiver Name: Search and select the required name of the receiver. The Receiver Account, Identifier Type, Identifier, Bank Branch Name, and Payment Reference fields are auto-displayed.
• Amount: Specify the required amount.
• Payment Currency: The payment currency is auto-displayed.
![]() You cannot edit the value in this field.
You cannot edit the value in this field.
• Charge Type: Select the required option from the available options BEN, OUR, and SHA.
• Status: The status is displayed.
2. Click Verify.
You can make payments to multiple receivers using a batch.
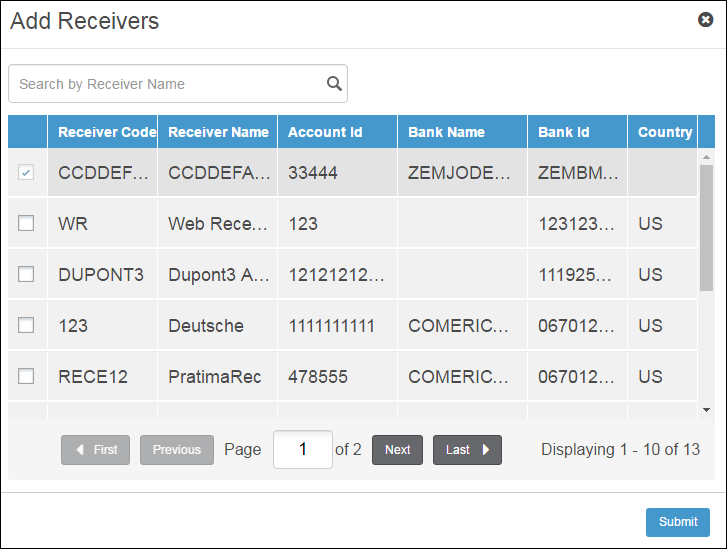
1. Click Add Receivers. The Add Receivers pop-up is displayed.
2. Select the check box corresponding to the required receiver code and click Submit. The receiver is added to the Transactions grid.
3. Click Verify.
You can make payments to multiple receivers using a batch.
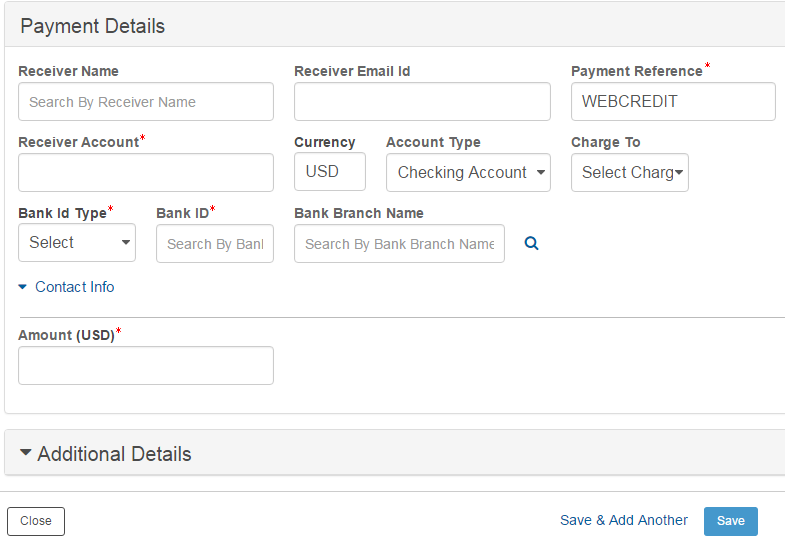
1. Click Use Transaction Wizard.
2. For more details about the fields for selected payment type, see Specifying wire payment details.
3. Click Save.
![]() To add multiple accounts, click Save and Add
Another button.
To add multiple accounts, click Save and Add
Another button.
4. Click Verify.
You can upload a file containing multiple transactions.
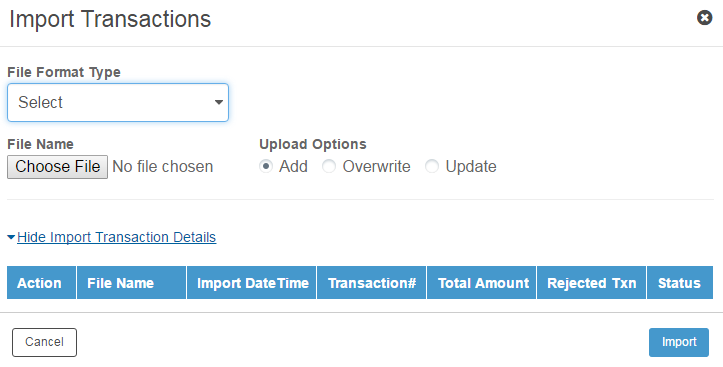
1. Click Import Transactions. The Import Transactions pop-up is displayed.
2. Specify the following details:
• File Format Type: Select the type of file format from drop-down list.
• File Name: Click Choose File and select the file to be attached.
• Upload Options: Select the required option to upload a payment file. The available options are:
– Add
– Overwrite
– Update
3. Select the required File and click Import. A list of uploaded files is displayed on the payment details page.
4. Click Verify to verify and submit the batch payment.
![]() You can change the amount for a specific or multiple transactions in a
batch using Quick Update feature
without editing each transaction separately.
You can change the amount for a specific or multiple transactions in a
batch using Quick Update feature
without editing each transaction separately.
![]() When a batch of multiple payments is created using template, the Quick
Update feature allows you to increase or decrease the amount of all transactions
by 10% of existing value or $100 across transactions selected.
When a batch of multiple payments is created using template, the Quick
Update feature allows you to increase or decrease the amount of all transactions
by 10% of existing value or $100 across transactions selected.
![]() Where to go from here
Where to go from here
![]() Verifying
and submitting the payment
Verifying
and submitting the payment
![]() Related
topics
Related
topics
![]() Creating
single recurring transaction
Creating
single recurring transaction
![]() Creating
batch recurring transaction
Creating
batch recurring transaction
| © 2017-19 Finastra International
Limited, or a member of the Finastra group of companies (“Finastra”).
All Rights Reserved.
Cat ID: FCM4.6-00-U02-1.5.3-201903 |